DIY Car Maintenance Series: 14 Engine Maintenance Tips For DIYers
8 min read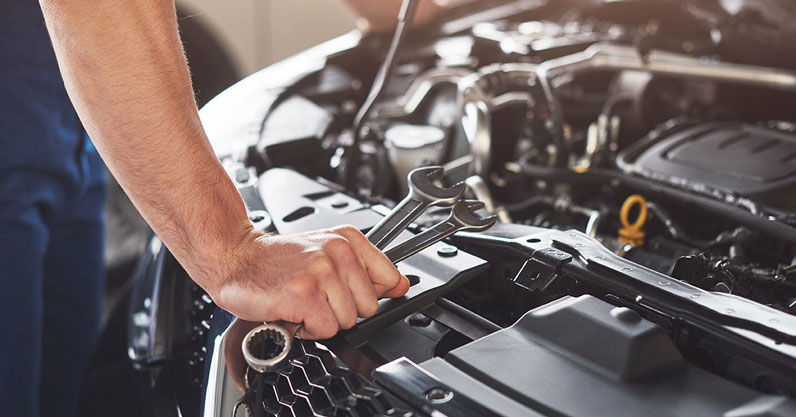
A fully functional car requires a healthy engine, and for your engine to remain in good condition it must be well-maintained. Otherwise, your car will be unusable and worse, unsafe, not only for you but for the thousands of drivers, passengers, and pedestrians you will be encountering on the road.
Add to that the costly and time-consuming repairs and replacements needed to be done, then it’s even more important to maintain your engine.
Over the next few paragraphs, we’ll share with you some very helpful and basic engine maintenance tips that you can do on your own, and that will definitely help keep your vehicle’s engine in tip-top shape. Use these tips to reduce repair expenses, improve your car’s performance, and extend its lifespan.
Why is engine maintenance important?
Engine maintenance is important for a bunch of reasons, mainly It improves the overall safety aspect of your car. It extends reliability and performance. It saves you from expensive repairs. It maintains the resale value of your vehicle. It makes your car more eco-friendly. It minimizes accidents and roadside emergencies.
Why should you learn basic car maintenance skills?
Learning a thing or two yourself can help you save time and money for those small problems that only need a quick fix. You don’t have to spend the entire day lining up by the auto repair shop and shelling out a few thousand pesos. DIY-ing can help you save for other more important stuff, especially in this season.
DIY engine maintenance tips
1. Mark your maintenance sessions.
Keep track of when your maintenance sessions such as the last oil change, air filter and spark plug replacement by jotting it down under your car’s hood. Use a chalk marker to make notes on a flat surface, such as an air filter cover, so you never forget important maintenance tasks every time you pop the hood.
2. Use sawdust to pick up oil spills.
Pick up used oil spills on the driveway or in the garage using sawdust. The material is readily available in most hardware or even pet shops. Maybe you can even ask for some if you have a woodworking shop in your neighborhood. Pour sawdust over the spill, let it soak up the liquid for about 20 minutes, and then sweep it up.
3. Keep a powerbank/jumper charge within reach.
A powerbank/jumper charge can be a real lifesaver in a pinch, especially if you have a car with an automatic transmission. When you’re shopping for this, make sure you get something reliable and well made. There have been cases of defective lithium jumper packs that burst into flames during a jumpstart. Find one that has safety features. Also, check how much power the battery puts out. 270 cranking amps is enough to start most four and six-cylinder engines.
4. Stay classy with drip pans.
Repairs and maintenance, even small ones, can be really messy. So if you want to continue this DIYer life, invest in something very useful like a drip pan. They’re available in most hardware stores nationwide. If you want to splurge a bit, get one with a lip around the edges so when you’re done, just pour the oil into a recycling bottle.
5. Light up the bay with retractable lights
Inspecting a jam-packed engine compartment that has deep and hidden components can be a real challenge. One solution is to use two lights: a retractable light that you can hang over the engine or stick on the hood to flood the entire area and a smaller handheld one to fit in tight places.
6. Removing a tight oil filter
Overtightened oil filters can be a real challenge to remove because they can become slick with a film of oil. Don’t remove a stuck oil filter by puncturing it with a long screwdriver. The screwdriver will just rip the can open and you’ll be drenched in oil. There’s a better way to do this. To remove a stuck filter, use a band-type wrench, then line it with coarse-grit adhesive-backed sandpaper for extra friction.
8. Free up a stuck hood latch
If your hood doesn’t latch and unlatch easily, chances are it’s rusty and dry. You can fix the problem in about 10 minutes with a rust penetrant spray (not WD-40) and some grease. Pop the hood and saturate the entire latch mechanism with rust penetrant.
Latch and unlatch the hood several times until the mechanism works smoothly. The rust penetrant won’t last long, so you’ll have to apply a better lube. Open the hood and spray all the moving parts with white lithium grease. Latch and unlatch the hood several more times and you’re good to go.
8. Replacing a fan belt
Automatic belt tensioners, standard in most cars now, make changing a serpentine belt a simple DIY repair. Snap on a long-handled ratchet or use a hex-shaped socket with a protruding nut to loosen up the fan belt.
Pull the belt slowly then replace it with a new one, according to your engine’s specification. Line it up well along well. Make sure that the belt is placed well within the grooves, then tighten the tensioner.
While you’re at it, check the tensioner. Tensioner allows for a light vibration but it shouldn’t move excessively. If it jerks in place, the tensioner might be in need of replacement.
9. Changing your spark plugs
You can change your spark plugs by yourself to maintain your car’s peak performance and high gas mileage. In most cases it’s a simple job as long as you have the right tools.
Start by finding where the head of your engine is. It’s usually covered with a hard black plastic with the car brand and engine type.
Once you remove the cover, you’ll see four ignition coils lined-up horizontally, if you have an inline four-cylinder engine. That’s where you can find the spark plugs. Before you open them up, make sure you wipe the head clean to avoid any dust and contaminants landing inside your engine. Blast it off with compressed air if you have one.
Disconnect the ignition coil from the electrical connector by pressing on and pulling the lock tab. Rock the ignition coil and pull out the entire coil and boot assembly. This will expose the spark plugs.
To remove them, unscrew the spark plug counterclockwise using a swivel head spark plug socket. Pull them all out and replace them with new ones.
Remember that there’s a specific torque requirement per engine when you tighten the new spark plugs back onto the engine. You can find these online or on the box. Insufficient torque might blow the spark plugs out of the engine. Too much and it bends the plug.
If you don’t have a swivel head spark plug socket, you can use needle-nose pliers, but you have to be careful with your new spark plugs because you might damage the ceramic part.
10. Iridium spark plugs provide smoother cranks
An iridium spark plug spark delivers faster starts vs copper-center ones because iridium spark plugs hold its sharpest edge longer, which is key to starting a vehicle.
Edges of copper-centered plugs round off quickly, making your vehicle crank harder as they become worn out. Iridium plugs cost a few bucks more, but they provide faster starts and last much longer than conventional copper plugs.
11. Recharge your car’s air conditioner
Improve the cooling of your car’s air conditioner with an easy-to-use A/C recharge kit. You can do it in four simple steps.
12. Clean your air/fuel intake system
Do you get a weird idle like your engine’s going to die or poor engine response when you put the pedal to the metal? You may have soot and carbon buildup on the valves, intake manifold and throttle body assembly, as well as clogged fuel injectors.
You can clean them up with a DIY fuel system tune-up kit, and it only takes 30 minutes. Grab the kit, prepare a set of screwdrivers, google, and rags, then follow the instructions or find a video online.
13. Save fuel and keep your engine efficient by closing the windows while you drive
Did you know that normal aerodynamic drag accounts for 30 percent of your fuel budget? Whenever you drive with the windows down, you introduce more drag and the aerodynamic efficiency of your vehicle plummets, making your engine use more fuel and work harder to get to speed.
This also applies to extra antennas, flags, or any attachments that are not from the factory. If you want to save fuel, ditch the attachments and drive your car stock.
14. Use a code reader to do pre-diagnostics before bringing your car to the shop
Diagnose car problems with precision using a code reader. It’s readily available online along with code interpretations for your specific vehicle. Just make sure to search for a compatible code reader before buying one.
Simply plug it into the car’s computer system found under the dash, then check for the trouble code readout. A diagnostic readout typically costs around ₱800 to ₱1,000, so it practically pays for itself.
About the author
Kevin Joshua Ng Kevin Joshua Ng is a digital marketing professional and car enthusiast who has written for In The Garage, a trusted resource for car owners in North America.