8 Money- And Life-Saving Maintenance Tips For Your Car’s Suspension
6 min readYour vehicle’s suspension system (dampeners, tires, linkages etc.) is responsible for the way the car handles. It takes a lot of beating over time because it bears the load of the vehicle while constantly working as the tires hit the road.
That’s why it needs to be taken care of. If any component breaks or malfunction, it can start a domino effect and bust other parts of the suspension as well.
While troubleshooting and replacing main parts of the suspension is a task best performed by professionals, you can take note of some essential knowledge. Here are tips for DIY car suspension maintenance that will save you money and a trip to the mechanic.
How does your car’s suspension work?
The suspension system acts as the shock absorber for your vehicle, swallowing the bumps and irregularities of the road. Without it, your car will become hard to control whenever the tires hit anything uneven.
In general, most suspensions are designed to withstand all types of bumps you find on the road. Mainly, these systems have to be maintained in top working condition if you want to keep your car driving well. You can start by following these maintenance procedures.
Car suspension maintenance tips
1. Changing power steering fluid
Power steering fluid helps your steering assembly make your handling as light as possible. Without it, you’ll have a hard time turning your car in any direction because you have to shift the steering’s weight in full. Trust me, I’ve busted a power steering belt in the middle of a race track before. My arms went sore for days.
You’ll have to rely on the manufacturer’s service recommendations or a general rule-of-thumb (two years or 24,000 miles/38,000 kms.). Use the turkey baster method to remove the old power steering fluid.
Suck out all the fluid with the engine off using a turkey baster. Then refill the reservoir with fresh fluid. Start the engine and let it run for about 15 seconds. Repeat the fluid swap procedure until you’ve used up the full bottle or until your reservoir reads full.
Never substitute a universal power steering fluid for the recommended type indicated on the manual. And never ever add “miracle†additives or stop-leak products. They can clog the fine mesh filter screens in your steering system and cause expensive failures.
2. Swapping out brake fluid (no full flushing required)
Some carmakers recommend replacing brake fluid every two years, or every 24,000 miles/38,000 kms. Others don’t mention it at all. But it’s easy to test your brake fluid. Just dip a test strip into the fluid and compare the color to the chart on the packaging.
You can’t do a complete brake fluid flush yourself, but you can do the next best thing—a fluid swap. This procedure won’t replace all the old fluid with a fresh one, but you’ll introduce enough new fluid to make a difference.
Use a baster to suck out the dark brown brake fluid. The brake fluid may damage the baster’s rubber bulb, so don’t suck the fluid all the way into the bulb. Don’t use the same turkey baster you use in swapping power steering fluid or in basting your turkey.
Squirt it into a bottle then refill the reservoir with fresh brake fluid. Drive the vehicle for a week to mix the new fluid with the old. Repeat the procedure several times over the next few weeks until the fluid in the reservoir retains its light honey color, like the color of new brake fluid fresh out of the bottle.
3. Cardboard drop cloth for those messy suspension parts replacements
Save large pieces of cardboard from boxes that you bring into your home. Store them along a wall in your garage or workshop so they’re at the ready when you’re working on a messy project underneath your car. A large slab of cardboard makes a perfect disposable drop cloth.
4. Blast off seized bolts
A can of rust penetrant is the secret to removing stubborn rusted seized bolts on your suspension linkages and wheels. Just spray it on and wait for a few minutes. Then use your wrench and socket to loosen up the problematic bolt or nut.
This works much better if you have a driver power tool. When you hit the trigger, the driver applies the impact to the center of the bolt head, demolishing the rusty build-up loosened by the rust penetrant.
5. Make tire changes faster and easier with an electric impact wrench
Changing a flat tire can be way easier if you have a compact electric impact wrench stashed next to your spare tire. It’s not as powerful as an air-powered wrench, but you don’t need that much of an investment when you’re DIY-ing.
If all you’re doing is tire rotation and an occasional tire change, an electric impact wrench is just the ticket is going to be all you need. Just make sure you use a hand-held torque wrench to tighten the lug nuts.
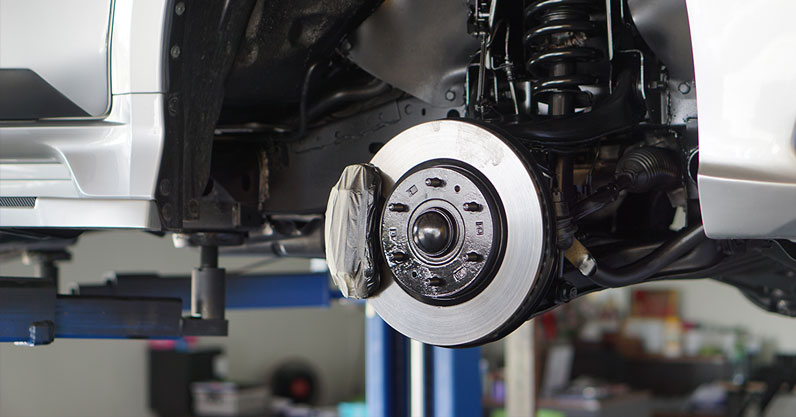
6. Proper way to torque lug nuts
Did you know there’s a right way to tighten lug nuts? Most people think tighter is better. That’s not true.
Overtightening lug nuts is the No. 1 cause of warped brake rotors called “brake rotor lateral run-out.†Warped rotors cause pedal pulsation and can increase your stopping distance.
OverÂtightening can also break wheel studs. Here’s what you need to do when tightening lug nuts in the event of a tire change:
- Spin the lug nuts on by hand. Never coat the stud with grease, oil or anti-seize.
- Lower the jack only enough to bring the tire into contact with the road.
- Tighten each nut to half the specified torque. Then lower the vehicle completely and tighten each nut to full torque.
- Consult your owner’s manual or a shop manual and set your torque wrench to one-half the recommended torque specification.
- Reset the wrench and tighten each nut to full torque.
- Move the socket from one nut to the next in a star-shaped sequence. By doing this, you’ll save yourself money and perhaps lives, through a roadside emergency.
7. Check your tire pressure every month
All tires lose air, so check your tires monthly. Always use the same tire pressure gauge and check the air pressure first thing in the morning, not after you’ve driven on them or they’ve been sitting in the hot sun.
Inflate to the pressure shown on the carmaker’s sticker found on the driver’s door, jamb, or owner’s manual. Do not always inflate to the maximum pressure indicated because air inside the tires expand whenever you drive.
The recommended tire pressure is based on the weight of your particular vehicle, not the tire brand or tread style.
8. Replacing sway bar end links
Fixing a clunk when your car hits a bump is a trial and error process. However, once you discover that the noise is coming from broken or distorted sway bar end links, you need to replace them at once.
Start by soaking the nut and stud with penetrating oil, then use a holding tool and a box end wrench to loosen the nuts. Once you get them off, check if you only need to replace the stabilizer bushings, which wear out more quickly, or the whole sway bar end link.
About the author
Kevin Joshua Ng Kevin Joshua Ng is a digital marketing professional and car enthusiast who has written for In The Garage, a trusted resource for car owners in North America.